Normal Map Generator: turn any image into PBR texture maps
Drop a photo or texture and get a normal map, height map, ambient occlusion, roughness and specular map in real time. Check them on a lit 3D sphere, cube or plane and download PNGs up to 4K or everything as one ZIP. Your image never leaves your device.
Loading…
How it works
- Drop a PNG, JPG or WebP image onto the page, paste one with Ctrl+V or start with one of the example textures.
- Adjust strength, smoothing and detail levels while the preview updates live. Switch the Y axis to DirectX if the map is for Unreal Engine.
- Check the result on a sphere, cube, plane or cylinder. Turn the light, tile the texture 2×2 and add displacement to see the depth.
- Pick the resolution and file name style and download single PNGs or a ZIP with every map. Tick Make seamless for textures that have to repeat without visible edges.
Which maps you get
All maps are calculated from the brightness of your image. That works best for surfaces where dark means deep and bright means high, such as stone, bricks, bark, fabric or metal plates.
- Normal map
- Fakes small bumps and grooves in the lighting without extra polygons. Filter (Sobel or Scharr), strength, three detail levels and the Y axis are adjustable.
- Height map
- Greyscale depth for displacement, parallax and tessellation. Available as 8-bit or 16-bit PNG, the 16-bit version has no banding.
- Ambient occlusion
- Darkens cracks and corners where less ambient light reaches. Calculated from the height map with adjustable radius and depth.
- Roughness
- Controls how blurry or sharp reflections are. Derived from brightness with a curve, minimum and maximum.
- Specular
- Reflection strength for specular workflows and older engines.
- ORM packed
- Ambient occlusion, roughness and metalness in the red, green and blue channel of one texture, the layout glTF and Unreal Engine expect. Metalness is 0.
Input and output: a sample and a library texture
This normal map maker works from a single photo or texture. As a normal map creator it computes the normal map and the matching height, ambient occlusion, roughness and specular maps live on your graphics card, so you see every slider change at once on a lit 3D shape.
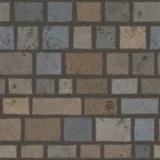
Stone wall sample
- Input
- The stone wall photo from the sample list in the left panel, a flat colour image without any depth data.
- Output
- Normal, height, AO, roughness, specular and ORM maps up to 4K, as single PNGs or one ZIP with the file names your engine expects.
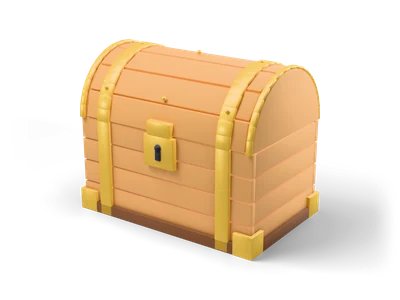
Treasure Chest
- Input
- Treasure Chest from the library ships a normal map that was baked from real geometry, next to its base color, roughness and metallic maps.
- Output
- Open it in the 3D Viewer and show the normal channel in the Textures tab: a reference for how a finished normal map looks on a game asset.
How to make a normal map from a photo
- Pick a photo or texture with even, flat light and no hard shadows. Shot straight on, the surface detail reads best.
- Drop it into the generator. Raise Fine for cracks and small grain, Coarse for large shapes, and set the overall Strength.
- Choose the Y axis: OpenGL for Blender, Godot, Unity and glTF, DirectX for Unreal Engine.
- Spin the light in the 3D preview. If bumps look like dents, invert the height. Turn on the seamless option for tiling textures.
- Download the normal map as PNG and connect it to the normal input of your material, with the texture set to non-color data.
What it does not do
- A normal map from a photo estimates depth from brightness. Dark paint can read as a dent, so check the result under a moving light.
- It adds surface detail, not shape. The silhouette of your model stays the same. For real geometry use the height map as displacement or model it.
- Baking a normal map from a high poly mesh onto a low poly mesh is a different job. Use Blender or another baking tool for that.
Frequently asked questions
Is the Normal Map Generator free?
Yes. It runs completely in your browser, with no account, no watermark and no limit. The maps you create belong to you and can be used in commercial games.
How do I make a normal map?
Drop a photo or texture into the generator, set the strength and the fine, medium and coarse detail, choose OpenGL or DirectX for the Y axis and download the PNG. The short guide below the tool walks through every step. Even light without hard shadows gives the cleanest result. Used this way the page is a normal map maker and creator in one, with the height, AO and roughness maps included.
Is my image uploaded to a server?
No. The image is decoded and processed on your graphics card by WebGL. Nothing is sent anywhere, which also makes the preview fast enough to update while you drag a slider.
OpenGL or DirectX normal map, what is the difference?
The two conventions differ only in the green channel (Y axis). Blender, Godot, Unity and glTF use OpenGL (Y+). Unreal Engine and some older tools use DirectX (Y−). If bumps look like dents in your engine, switch the Y axis and export again.
Can I make a texture seamless?
Yes. Make seamless blends the edges of the image with a shifted copy so the texture repeats without visible seams. Use Tile 2×2 in the preview to check the result. Tileable edges on its own only makes the filters wrap around the border, for images that already tile.
Why does my normal map look inverted?
The generator assumes that bright pixels are high. For images where dark parts stick out, such as dark rivets on a light plate, tick Invert height. If only the lighting from above and below is swapped, change the Y axis instead.
Which resolution should I export?
Use the size your texture has in the game. 1K or 2K is enough for most props, 4K for large surfaces and close ups. Upscaling a small image does not add detail, so Original keeps the size of your source.
Can a photo become a real PBR material?
Brightness is only an estimate of depth, so the maps are an approximation. For flat surfaces like walls, floors, fabric or bark the result is usually convincing. Photos with strong shadows or highlights work better after evening out the lighting.
How do I use the maps in Blender, Unity, Unreal or Godot?
Plug the normal map into a normal map node or slot set to non colour data, the height map into displacement, AO and roughness into their slots. For Unreal choose DirectX and the T_ file names, for glTF, Godot and Blender keep OpenGL. The ORM texture feeds the packed occlusion roughness metallic slot.
The three example textures were generated procedurally for this tool and are CC0 (public domain). About the license →
Shrink finished models in the GLB Optimizer → All free tools →