Rigged Characters in Unity, Godot and Unreal: Walk & Run
September 29, 2026 · 7 min read · Written by the Grab3D team (About us)
Currently eight models on Grab3D come with a rigged variant: the samurai, the armored knight, the viking, the wizard, the sci-fi soldier, the robot, the alien and the human skeleton. All of them are CC0, so you can use them in commercial games without credit. This guide shows how to get one walking and running in Unity, Godot 4 and Unreal Engine 5, and where the rig reaches its limits.
What the rigged download contains
The rigged variant is a separate download on the model page, next to the static High Detail files.
- Files: GLB, FBX and .blend, all without mesh compression. There is no USDZ or OBJ for rigged variants.
- Skeleton: a humanoid rig with 24 bones: hips, three spine bones, neck, head (plus two small helper bones at the head), shoulders, upper arms, forearms, hands, upper legs, lower legs, feet and toes. There are no finger, jaw or face bones.
- Animations: two clips, walk (1.0 s) and run (0.625 s). Both are in place: the hips only move a few centimeters, there is no root motion. Your character controller moves the character, and the clip only animates the body.
- Mesh and textures: 216,000–300,000 triangles and 2K PBR textures. The original texture is baked back onto the rigged mesh after rigging.
- Scale: real-world meters, pivot at the feet. The samurai, for example, is 1.75 m tall.
Which file to take: FBX for Unity and Unreal, GLB for Godot (the FBX works there too), .blend for Blender. All three are roughly the same size, and the GLB is not Draco-compressed, so Godot reads it natively and Unity needs only a glTF package. File sizes per format are in our file-size measurements.
Unity
Set up the Humanoid avatar
- Drag the rigged FBX into your
Assets/folder. - Select it and open the Rig tab in the Inspector. Set Animation Type to Humanoid and Avatar Definition to Create From This Model, then click Apply.
- Click Configure… to check the bone mapping. Unity maps the bones automatically from the hierarchy. The required bones (hips, spine, head, arms, legs) should be assigned. The finger slots stay empty. The rig has no finger bones, and that’s fine. If a bone is missing or wrong, assign it manually in the mapping view, then click Done.
Make the clips loop
Open the Animation tab of the same FBX. Select the walk clip in the clip list, tick Loop Time, and do the same for run. Click Apply. Use the clip names exactly as Unity lists them.
Build the Animator Controller
- Create an Animator Controller and add a float parameter
Speed. - Add the walk and run clips as two states, with transitions walk → run when
Speedis above your threshold and run → walk when it is below. Untick Has Exit Time on both transitions so the switch reacts immediately. (A 1D Blend Tree onSpeedwith walk and run works as well and blends smoothly.) - Put the character in your scene, assign the controller to its Animator component and leave Apply Root Motion off, because the clips are in place.
Move it with a CharacterController
Because the clips have no root motion, a script moves the character and feeds the speed to the Animator. A minimal example for the classic Input Manager (with the new Input System, read your action instead):
using UnityEngine;

[RequireComponent(typeof(CharacterController))]
public class SimpleMover : MonoBehaviour
{
    public float walkSpeed = 1.5f; // tune until the feet stop sliding
    public float runSpeed = 4f;
    CharacterController controller;
    Animator animator;

    void Awake()
    {
        controller = GetComponent<CharacterController>();
        animator = GetComponentInChildren<Animator>();
    }

    void Update()
    {
        var input = new Vector3(Input.GetAxis("Horizontal"), 0f, Input.GetAxis("Vertical"));
        input = Vector3.ClampMagnitude(input, 1f);
        float speed = Input.GetKey(KeyCode.LeftShift) ? runSpeed : walkSpeed;
        Vector3 velocity = input * speed;
        controller.SimpleMove(velocity);
        if (input.sqrMagnitude > 0.001f) transform.forward = input.normalized;
        animator.SetFloat("Speed", velocity.magnitude);
    }
}
Put this script and a CharacterController on a parent object, with the character model as its child (rotate the child if the model faces the wrong way). Adjust the CharacterController’s height and center to the character.
The GLB route
If you prefer glTF, install a glTF package (glTFast or UnityGLTF). The rigged GLB is not Draco-compressed, so no Draco package is needed. The animations come in as clips, but how Humanoid avatars are set up differs between the glTF packages. For the Mecanim Humanoid workflow above, the FBX is the simpler route. More in the Unity import guide.
Godot 4
Import the GLB
Use the GLB of the rigged variant: glTF is Godot’s native format, and our rigged GLB carries no Draco compression. The rigged FBX works as well in Godot 4.3 and newer. Copy the file into your project, and Godot imports it automatically.
Set the loop mode
Double-click the file to open the Advanced Import Settings. Select the walk animation in the tree, set its Loop Mode to Linear, do the same for run, and click Reimport.
Play the clips
Instance the imported scene as a child of a CharacterBody3D. Its AnimationPlayer lists the clips. Use the names exactly as they appear there. For a quick test, call play() with the walk clip’s name on the AnimationPlayer.
For smooth transitions, add an AnimationTree, point it at the AnimationPlayer, and use a BlendSpace1D as its root with walk at 0 and run at 1. A minimal movement script for the CharacterBody3D (Godot 4.3+, assuming the model is a child node named Model that faces +Z):
extends CharacterBody3D

@export var walk_speed := 1.5 # tune until the feet stop sliding
@export var run_speed := 4.0
@onready var anim_tree: AnimationTree = $AnimationTree
@onready var model: Node3D = $Model

func _physics_process(delta: float) -> void:
    var input := Input.get_vector("ui_left", "ui_right", "ui_up", "ui_down")
    var dir := Vector3(input.x, 0.0, input.y)
    var speed := run_speed if Input.is_key_pressed(KEY_SHIFT) else walk_speed
    velocity.x = dir.x * speed
    velocity.z = dir.z * speed
    if not is_on_floor():
        velocity += get_gravity() * delta
    move_and_slide()
    if dir.length() > 0.01:
        model.rotation.y = atan2(dir.x, dir.z)
    var horizontal := Vector2(velocity.x, velocity.z).length()
    anim_tree.set("parameters/blend_position", clampf(inverse_lerp(walk_speed, run_speed, horizontal), 0.0, 1.0))
There is no idle clip: when the character stands still, pause the animation or add your own idle. For general import settings, see the Godot import guide.
Unreal Engine 5
Import as a Skeletal Mesh
Drag the rigged FBX into the Content Browser. In the import dialog, make sure it is imported as a Skeletal Mesh, leave the skeleton field empty so a new Skeleton is created, keep Import Animations enabled and let Unreal create a Physics Asset. You end up with the skeletal mesh, its skeleton, a physics asset and the walk and run animation sequences. Newer engine versions use a different import dialog, but the options have similar names.
Check height and orientation
Unreal works in centimeters. Open the skeletal mesh and check the height: the samurai should be about 175 cm. Only if the size is clearly off, reimport with an adjusted Import Uniform Scale. In your Character Blueprint, rotate the mesh component so the character faces the capsule’s forward direction (X) and move it down so the feet touch the bottom of the capsule. That is the same adjustment the engine’s own template characters use.
Walk, run and movement
Create a Blend Space 1D on the skeleton with a speed axis, walk at the lower end and run at the upper end. In an Animation Blueprint, read the velocity from the Character Movement Component, feed its length into the blend space and output the pose. Because the clips are in place, the Character Movement Component does the actual moving, so no root motion setup is needed.
Reusing mannequin animations
This skeleton is not Unreal’s mannequin skeleton: the bone names and count differ, and there are no finger bones. To reuse mannequin animations, create an IK Rig for each skeleton (with retarget chains for spine, head, arms and legs) and connect them in an IK Retargeter, then export the retargeted animations. Newer engine versions can suggest chains for common humanoid skeletons, but check the result (especially shoulders and hands) and expect some manual tweaking.
Honest limits
- Automatic rig, not manually weighted. Deformation at shoulders, elbows and hips can be imperfect in extreme poses. Loose cloth, capes, robes, hair and separate armor pieces have no bones of their own and move with the nearest bone.
- 24 bones, no fingers, no face. Hands keep their modeled pose, there is no facial animation, and there is no dedicated weapon bone. Attach props to the hand bone (a socket in Unreal, a
BoneAttachment3Din Godot). - Only walk and run. No idle, jump or attack clips. Unity’s Humanoid retargeting, Unreal’s IK Retargeter and Godot’s bone map for humanoid skeletons can help you bring in other clips, but results depend on proportions and need checking.
- High triangle counts. At 216,000–300,000 triangles, these are hero characters. For many characters on screen at once, build your own LODs.
- Two-legged characters only. Automatic rigging works for bipeds, and our four-legged animals don’t have a rigged variant.
Missing a character or an animation? Add it to the request board. Licensing questions are answered on the license page and in the FAQ, and how the rigs are made is described on how we make our models.
Related models
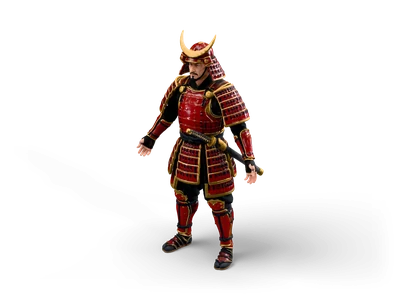
Samurai
800,000 triangles GLB 29 MB
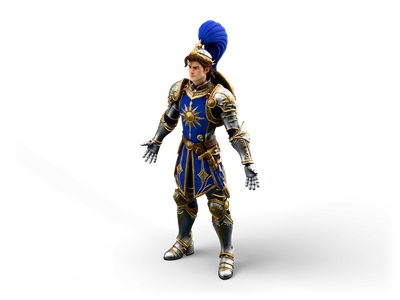
Armored Knight
800,000 triangles GLB 29 MB
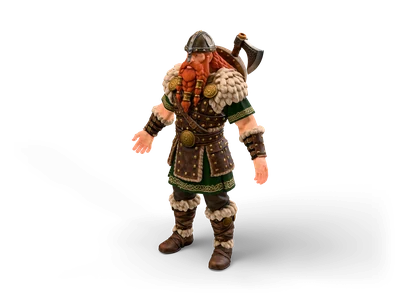
Viking
799,998 triangles GLB 28 MB
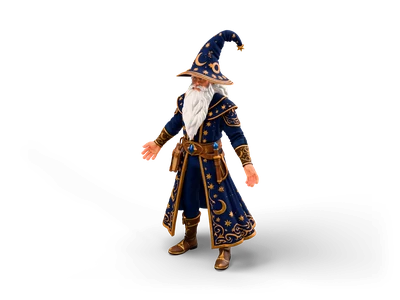
Wizard
800,000 triangles GLB 27 MB